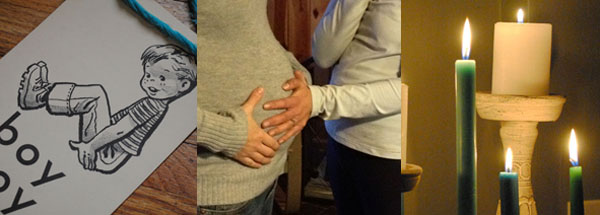
baby shower part 5: making onesies
As you know, the girls and I have been sharing our baby shower story. See below for part 1-4.
baby shower part 1: making plans
baby shower part 2: making invitations
baby shower part 3: making decorations
baby shower part 4: making food
Jen: We knew from the get-go that the creativity of this group of ladies needed to be harnessed somehow. And how better to spend a Saturday night than drinking wine, eating good food, and celebrating a friend by using creativity to make something she actually needs? However, we also knew there is a very fine line between a relaxing, creative activity and an annoying, tacky craft time.
After one Saturday browsing some very cute local shops, a few of us ended up at Digs, and there I saw some of the cutest onesies on planet earth. The mother-to-be was in the vicinity, so I grabbed a couple of favorites (one with a sewed on a tie and another of a little fox) and snuck around the store whispering to the others in a not very quiet voice, “We have to make these for Lynds. Am I right? Can we do it? We are so going to do it.”
So, I went home and did some Pinterest and Google surfing and found many different tutorials on how to make DIY onesies. None of them were quite right. Most had too many or too little steps, too many or too few instructions, or they involved magic markers or puffy paint. (Not happening!)
So, I created a hybrid to give us what we wanted. Here is what we came up with:
Supply List:
- Ironing board
- Irons
- Good scissors
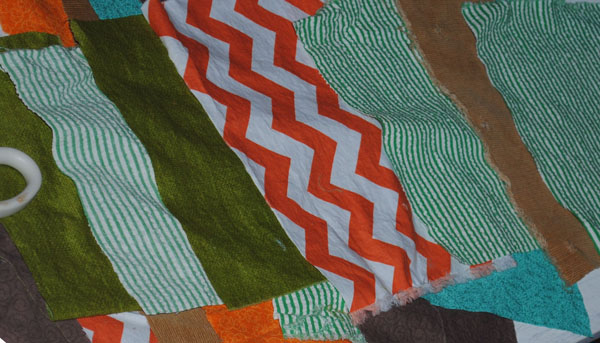
- Fabric squares – prewashed or the images won’t iron on.
- Templates: tree, state of MN, apple, turtle, elephant, owl, bird, leaf, star (I searched for these silhouettes in Google Images, printed them off, and cut them out)
- Heat’n Bond cut into squares just big enough for templates
- Embellishments like ribbon, buttons and thick embroidery thread
- Markers for tracing templates onto Heat’n Bond
- Needles (large enough for embroidery thread)
I gathered all the supplies and set it up on a bench that we could pull out when the time came.
Instructions:
- Choose a template
- Pick fabric square
- Grab a piece of Heat’n Bond and iron onto back side of fabric
- Trace template on fabric front side and cut out
- Peel back paper on Heat’n Bond, set aside sticky side up
- Iron onesie (quickly across the front)
- Place template sticky-side down onto front of smooth onesie and iron it on
- Embellish with extra fabric, ribbon, buttons, or thread
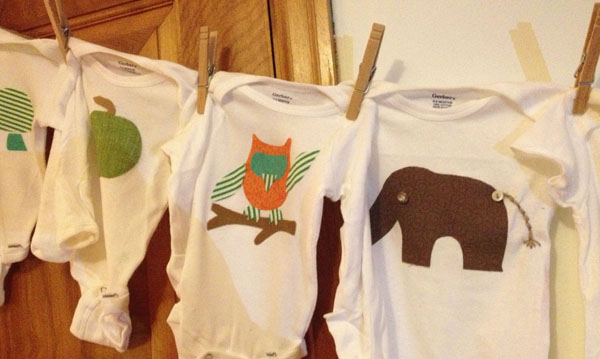
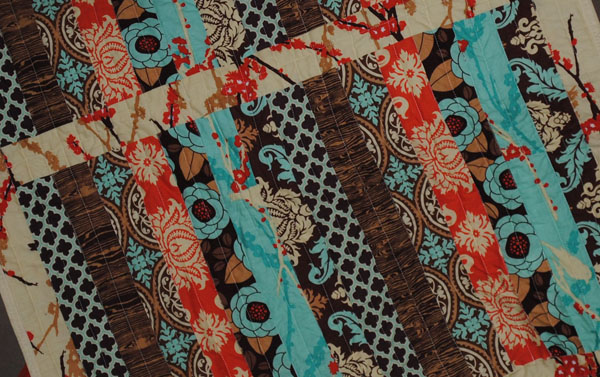
Heather: I loved this activity and even more so how Jen went about organizing it. Every single person jumped at the opportunity and went into a making mode. There was Ashley going off the beaten path and resisting the heat’n bond – just sewing her own little thing. There was Brittany on her second t-shirt before I even picked out a template for my first. There was collaboration and individual creations. Lynds just got to sit and watch all her friends putting their loving hands to something for her little guy. Adorable and so fun. Since I’m not a sewer like the lovely Lucy, she made this gorgeous quilt for Lyndsay,
this was especially satisfying for me to make something so quickly that turned out soooo cute. To see the multi-sized onesies all hanging on the line at the end was adorable.
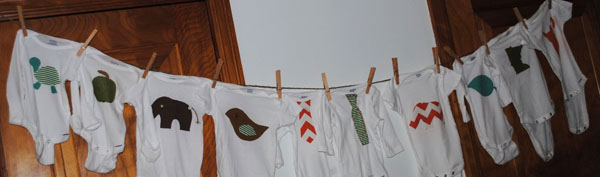
I loved the symbols Jen chose, and if we’d of had the time, we thought little words would have been double adorable.
Mister, slowpoke, sleepy, homegrown …
Kristin: What better finale to this non-traditional baby shower than the cutest, totally functional project for the little guy? I LOVED how easy it was to jump in and try this project – it was foolproof! Jen’s perfect prep made the steps easy to follow, so no matter the skill level, everyone could participate and contribute something. This activity was such a hit that I’ve since used this technique outside of the shower for onesie gifts for my other expecting friends. A total DIY win!
Stay tuned for one last post, a hodgepodge of shower and baby.
~H
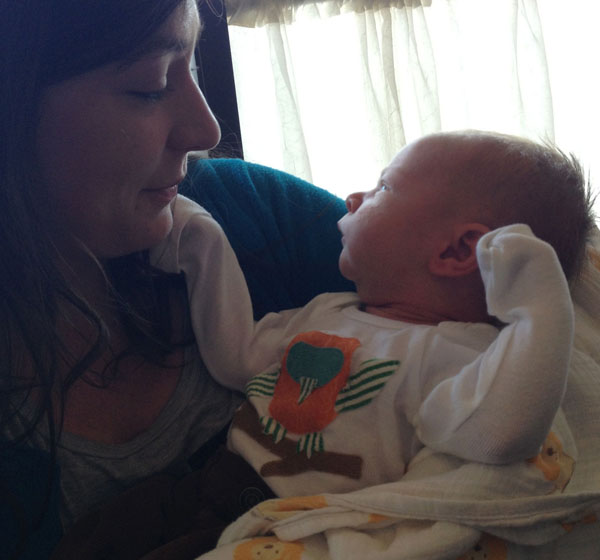
Last photo of Kristin and Benjamin, just a couple weeks old, wearing his owl onesie.
Last Updated on June 16, 2022 by Heather Bursch
One Comment